Making the gauntlets
1st. December 2005
During this period the individual fingers of the gauntlets were protected by a number of small overlapping lames. Often the gauntlets showed very graceful lines narrowing at the wrist with a long and sometimes ornate cuff extending over the vambrace.
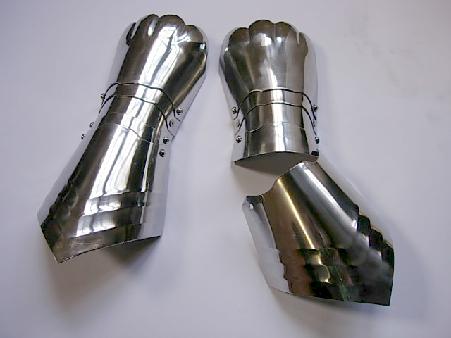
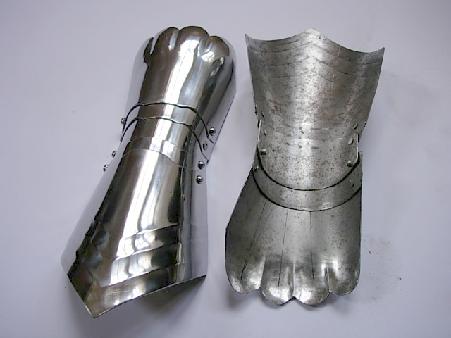
The plate covering the back of the hand, together with the two lames and pivot plate articulating at the wrist, are essentially the same as in 'Project 1' so I won't go into their detailed construction here. ( If you would like a re-cap this link will take you to the relevant page ). The cuff plate for this gauntlet is longer than that shown in either 'Projects 1 or 2' with fluting imparted to the upper border. The first two images on this page, Figs. 95 & 96, show the back-plate, wrist articulation and cuff assembled.
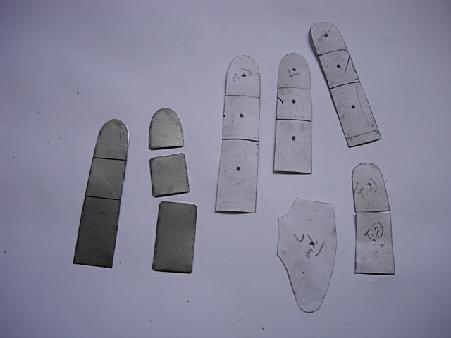
The next stage is to cut out the finger lames. Here I am using three lames for each finger and two for the thumbs. I have found it necessary to cut out, shape and finish the lames for each finger - and articulate them by riveting to a leather strip - before moving on to the next, otherwise one becomes hopelessly confused! Fig. 97 shows the lames being cut out with their card patterns, together with the pattern that will form the piece covering the base of the thumb.
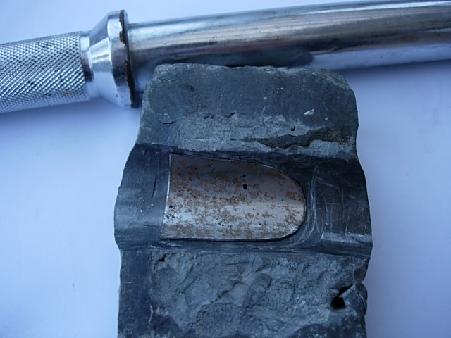
The individual lames are curved by striking into a groove in the lead block using a steel bar. The lame is sandwiched between the bar and block and the bar struck with a heavy hammer. The bar I am using here is a weights dumb-bell bar and the groove in the block is formed by placing the bar over it and striking it hard several times with the hammer until the desired depth of indentation is produced. Fig. 98 shows the lame for the end of one of the fingers being curved to shape.
In the next image, Fig. 99, the lames for one of the fingers are curved and drilled ready for finishing.
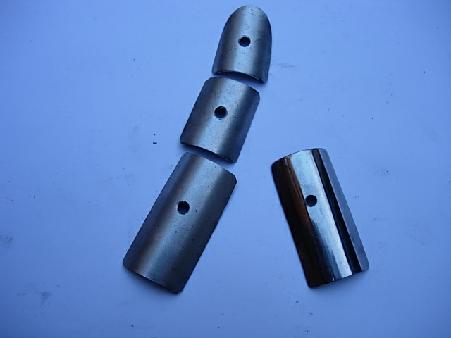
With small pieces like this it is essential to place the rivet holes precisely in the centre so the rivets will lie in a straight line. If the hole is as little as 1mm. out of line the overall look of the finished gauntlet will be spoilt. I have learned by experience to drill the pieces before finishing - the lame on the right in Fig. 99 was polished before drilling and the hole is slightly off to the side of the piece - so all the time spent polishing it was wasted :-(
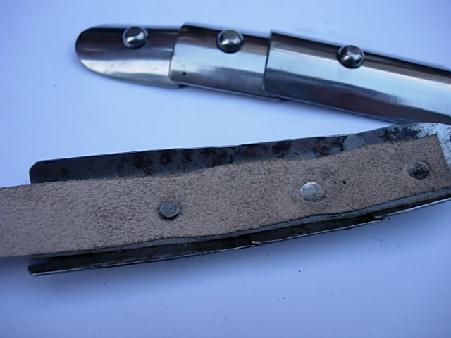
When the individual lames are drilled and polished they are ready to be riveted to a leather strip. Here I am using the same 4 x 4 mm. round-headed rivets used in the rest of the armour. Previously when fixing to leather I have used slightly longer rivets with a washer over the leather. Here I have disovered the washer is not really necessary. If the hole punched in the leather is slightly narrower than the shaft of the rivet and the latter is carefully piened, it holds the leather very securely in place and there are no projections to chafe the back of the fingers when fixed to a glove ( Fig. 100 ).
The next image, Fig. 101, shows the components that will make up the gauntlet ready to be assembled.
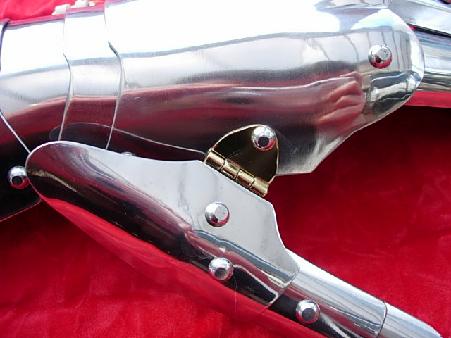
The piece that covers the base of the thumb is fixed to the back-plate of the hand with a hinge. This is riveted to the inside of the thumb plate but outside the back plate of the hand. The resulting rotation about this point allows for abduction of the thumb as can be seen in Fig. 102.
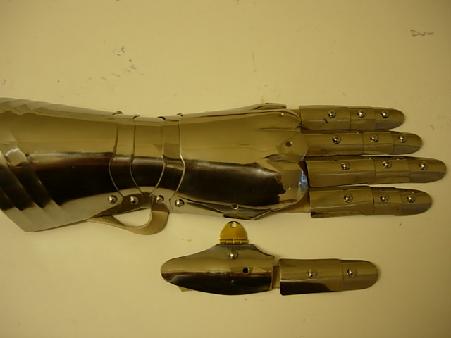
The final images on this page, Figs. 103, 104, & 105 show the completed gauntlets.
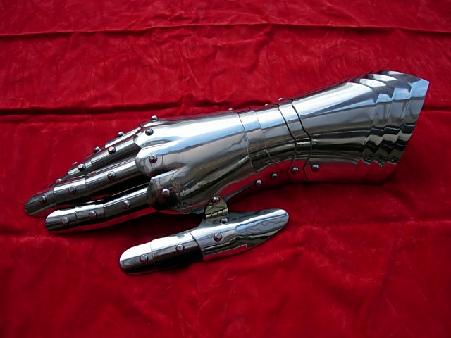
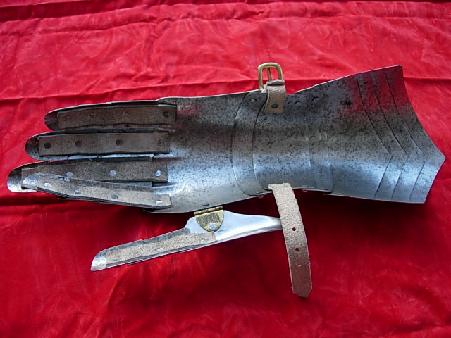

These gauntlets are intended for display rather than use. In order to make them wearable arming nails, which are basically 4 mm. diameter flat-headed mild steel nails, are used to pierce the ends of the fingers of a pair of leather gloves. The nails are substituted for the rivets holding the finger-end lames, cut so as to protrude 2 - 3 mm. and carefully piened from the outside, holding the gauntlet to the back of the glove.
On to the next page in this armour - the gorget and mentonnière.