The besague
At this stage in armour design the pauldrons did not as a rule extend down to any extent over the front of the cuirass. As a consequence the armpit was left unprotected and vulnerable. This was overcome by the use of plates attached by straps to the lower front edge of the pauldron. These were known as besagues or rondels. They were usually saucer-shaped with the concave surface presented to the front, presumeably so as to contain a thrust from a pointed weapon rather than deflect it into the space between upper arm defense and cuirass.
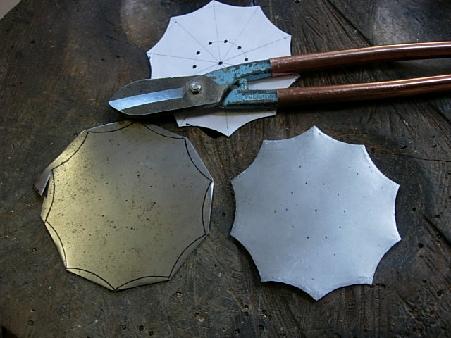
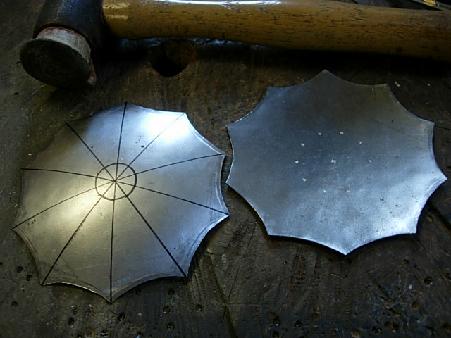
The first image on this page ( Fig. 79 ) shows the pieces being cut from the steel sheet.
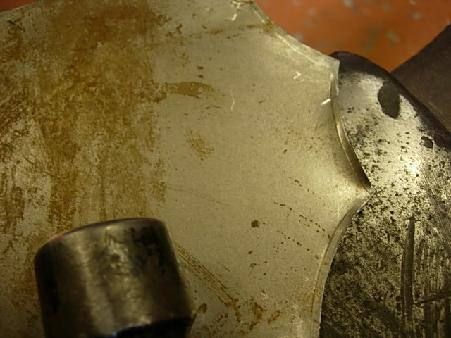
Cutting out the engrailed edges with the shears results in a degree of deformity of the metal and this has to be corrected by light hammer-work against the flat of the anvil ( Fig. 80 ). ( In fact after cutting out all pieces I generally work round the edges with the light hammer before any shaping takes place ).
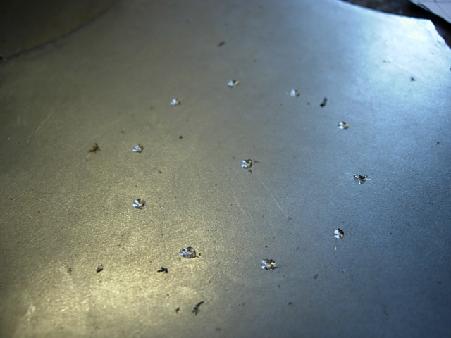
Before any further shaping is carried out the holes for the decorative rivets are marked. These are partially drilled so their positions will not be lost during subsequent hammer-work ( Fig. 81 ).
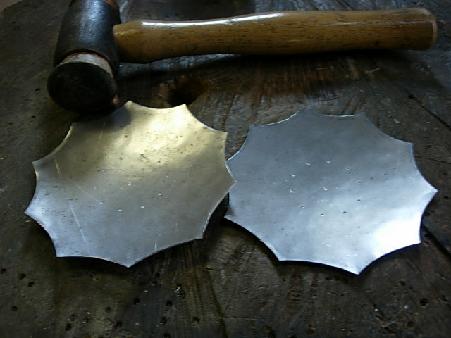
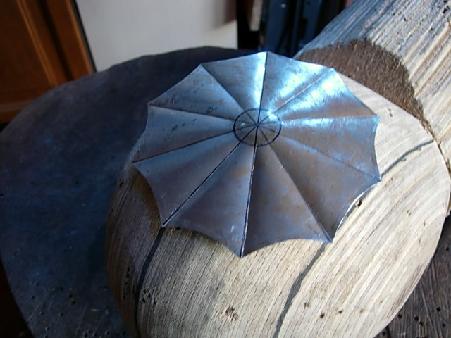
In the next image, Fig. 82, the pieces have been dished into the shallowest of the three depressions on the stump using the rawhide hammer.
The lines for fluting are marked on the convex surface - ( Fig. 83 ) -
- and in Fig. 84 fluting has been carried out over a round wooden block to conserve the saucer shape.
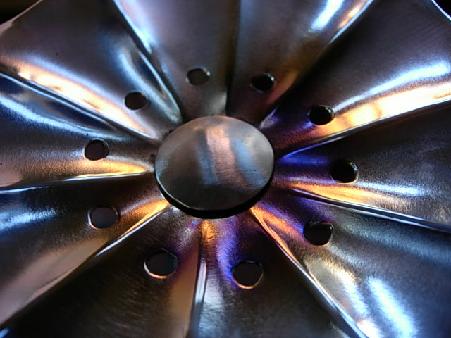
Next the rivet holes are drilled through prior to fixing the central boss, which is a small domed piece. I have found the easiest way to fix this is to firstly melt some solder into the centre of the convex surface and at the same time cover the head of a rivet in solder ( Fig. 85 ).

The rivets are placed in the centre of the besague and, with the boss resting on the rivet head, heat is applied to the underside of the piece. As the solder melts the boss settles down neatly in place and any minor adjustment in position can easily be carried out before the solder hardens ( Fig. 86 ).
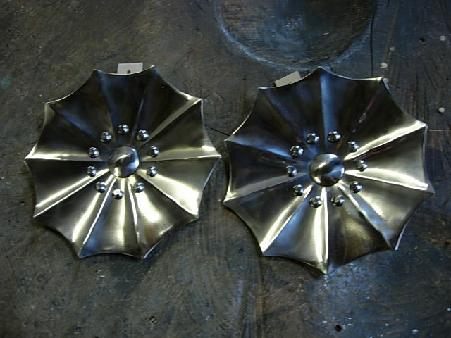
The besagues are polished and the decorative rivets placed. Fig. 87 shows the finished rondels -
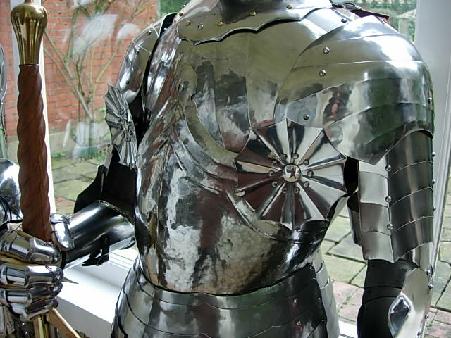
- and in Fig. 88 they are attached to the lower border of the pauldron.
The besagues were a late addition to this armour at the end of January 2006, after completion of the cap-à-pie armour from Project 3. It was only during construction of the latter that I worked out how to carry out the fluting whilst still maintaining the domed shape.
The armour is now complete and all that remains to be done is to clean, paint and dress the mannequin so the armour can be re-assembled for display. On the next page the mannequin is made ready.