The pauldron and spaulder
The pauldrons for armour of this period were quite large, affording considerable protection to the vulnerable area around the arm openings of the cuirass, whilst still allowing free movement. Making these pieces to be aesthetically pleasing in the way they fit to the shape of the cuirass has proved to be quite challenging and I hope I have been reasonably successful in this.
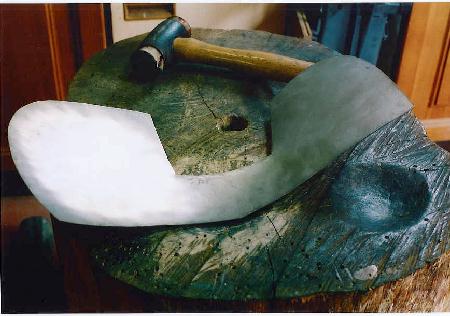
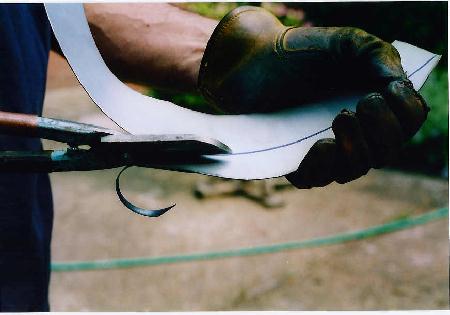
The pauldron is made in three parts. Fig. 59 shows the largest of the plates cut out and with the initial dishing just started.
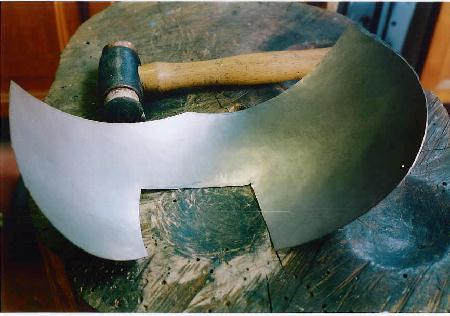
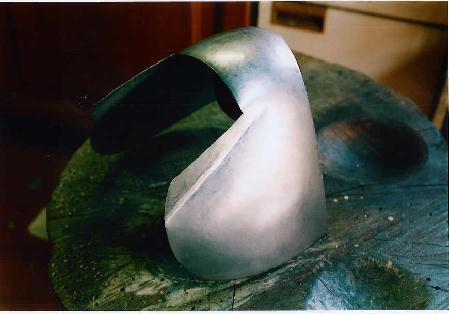
The whole piece is dished into the shallow depression on the stump using the rawhide hammer so that an even curve is formed and Fig. 60 shows the completion of this stage of the hammer work.
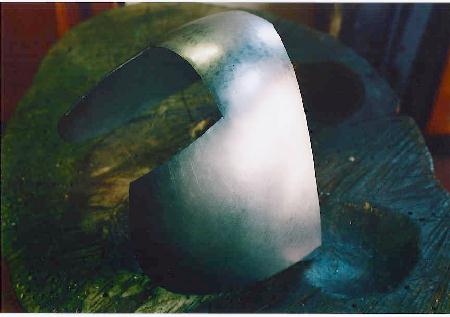
Next the area that will form the shoulder cop is dished more deeply - again using the rawhide hammer - but this time into the deeper depression on the stump. This area then needs to be planished over the steel ball to produce a smooth, even dome shape ( Fig. 61 ).
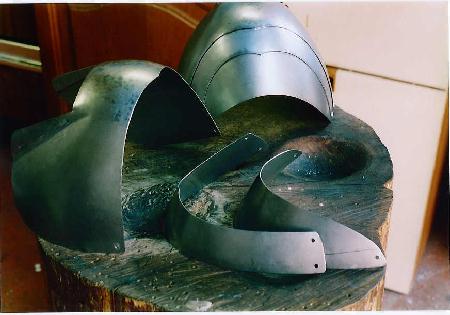
The next stage is to create the everted wing sections either side of the opening that will accommodate the spaulder lames. Positioning of these is critical as it is this line that will determine whether the front plate of the pauldron in particular lies closely adapted to the line of the cuirass. Fig. 62 shows the position of the creases marked out on the inner aspect of the pauldron -
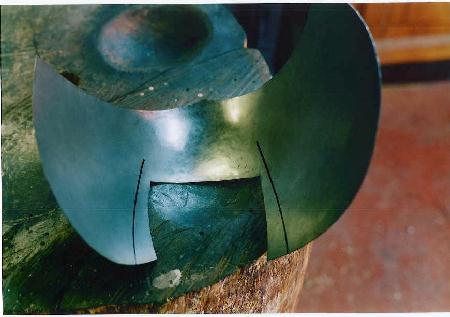
- and in Fig. 63 the creases have been made to form the turned out wings.
In Fig. 64 the two upper lames of the pauldron are being cut out. These then have a gentle doming imparted to them as they are curved to fit closely within the main section - and Fig. 65 shows one pauldron assembled and the other with pieces drilled ready for assembly.
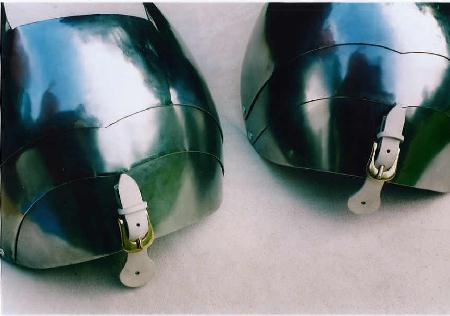
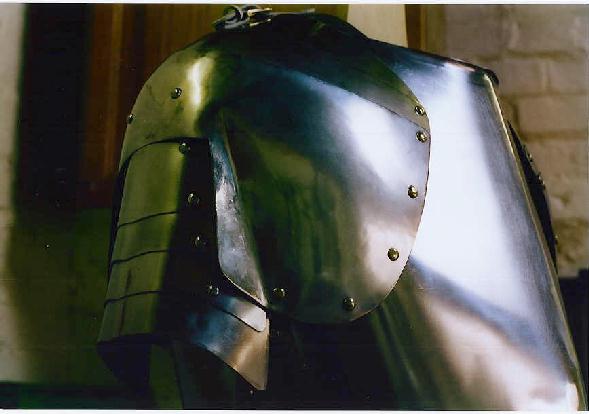
Great care needs to be taken when drilling the rivet holes, as being just a fraction of a millimetre out will result in the lames not being closely adapted to each other, which spoils the appearance of the piece. I find it helpful to ask someone else to mark the position of the hole whilst I hold the lames together. Fig. 66 shows the finished pauldrons after polishing and with their strapwork that will attach them to the top of the cuirass in place.
Four spaulder lames are used here to form the defense for the upper arm. These are simply curled around the wooden stake, the lower lames fitting within the upper. ( I will not bore you with describing the detail of making these here as it was covered extensively in 'Project 1' ). Fig. 67 shows the assembled spaulder within the pauldron ( note the centre-lines marked to aid the assembly ).

The final image on this page, Fig. 68, shows the completed pauldron and spaulder in place on the cuirass. It can be seen that the front plate of the pauldron lies closely against the cuirass and curves smoothly in to follow it's shape. Here brass rivets have been used as decoration around the border of the pauldron plates and I have started replacing the 'pop' rivets used in the preliminary assembly with conventional round-headed rivets.
On to the next page - making the lower arm defense.